MiniTool Partition Wizard Server 8
- Convert NTFS to FAT.
- Copy Dynamic disk volume.
- GPT Disk and MBR Disk interconversion.
- Copy UEFI boot disk.
- Convert GPT-style Dynamic Disk to Basic.
- Move Boot/System volume for Dynamic Disk.
MiniTool Partition Wizard Help
Getting Started
Using MiniTool Partition Wizard
- MiniTool Partition Wizard Basic
- General
- Menu Of View
- Disk Operations
- Align All Partitions
- Copy Disk
- Delete All Partitions
- Rebuild MBR
- Initialize to MBR Disk
- Initialize to GPT Disk
- Partition Recovery
- Wipe Disk
- Disk Properties
- Convert Dynamic Disk to Basic Disk
- Convert MBR Disk to GPT Disk
- Convert GPT Disk to MBR Disk
- Surface Test
- Partition Operations
- Extend Partition
- Split Partition
- Align Partition
- Move/Resize Partition
- Merge Partition
- Copy Partition
- Explore Partition
- Create Partition
- Delete Partition
- Format Partition
- Label Partition
- Change Letter
- Set Active/Inactive
- Hide/Unhide Partition
- Check File System
- Convert FAT to NTFS
- Convert NTFS to FAT
- Wipe Partition
- Partition Properties
- Set Partition as Primary
- Set Partition as Logical
- Surface Test
- Change Partition Serial Number
- Change Partition Type ID
- Change Cluster Size
- Dynamic Disk
- Create Volume
- Delete Volume
- Format Volume
- Move/Resize Volume
- Wipe Volume
- Explore Volume
- Check File System
- Change Volume Label
- Change Volume Letter
- Change Volume Cluster Size
- Volume Properties
- Wizard
- Technical Support
Move/Resize Partition
-
There are several ways to start Move/Resize operation:
- 1. Select the partition you would like to move or resize » click Partitions in the top menu » click Move/Resize.
- 2. Select the partition you would like to move or resize » click the Move/Resize Partition button in the Tool Bar.
- 3. Select the partition you would like to move or resize » click the Move/Resize Partition button under Partition Operations in the Action Panel.
- If the space of the partition is not enough, you can shrink the free space in other partitions to enlarge the capacity of this partition. In this case, the security of data is ensured.
Your data would not be destroyed or go missing when enlarging, shrinking or moving partitions around.
What's more, under Enhanced Data Protecting Mode, you can execute the Move/Resize operation to system partitions or boot partition without harming the data. - About Enhanced Data Protecting Mode
- 1. This function is an advanced security measure designed to protect your data when executing the operation of Move/Resize. Even in the event of a power failure or hard ware failure, you can be ensured that your data are completely safe. For some extreme conditions, such as if the partition suffers from unknown failure, you can also use command chkdsk.exe /F in Windows to recover your data. This feature is exclusive to MiniTool Partition Wizard.
- 2. The handling partition should have enough space compared to those partitions not use this function.
- 3. Note: If the capacity of partition changes, MiniTool Partition Wizard will defined the type of FAT according to the new capacity of the partitions. For instance, FAT12, FAT16, FAT32.
- How to extend system partition?
Following sample shows you how to extend the system partition by using MiniTool Partition Wizard.
Case study:
Disk is configured as 2 partitions. Partition C & D. C is system partition. Goal is to extend 10.9 GB free space to partition C.
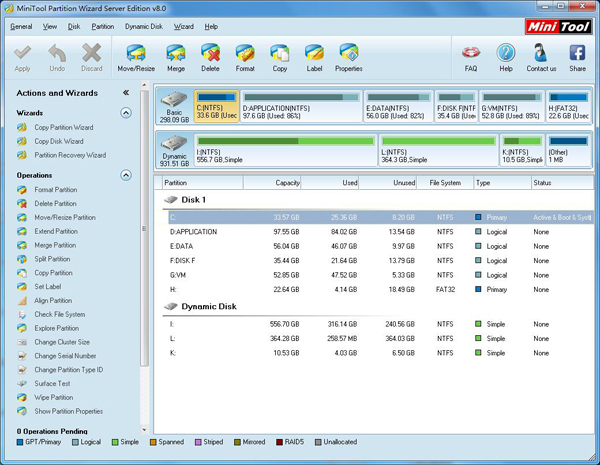
Step 1: Create 10.9 GB free space
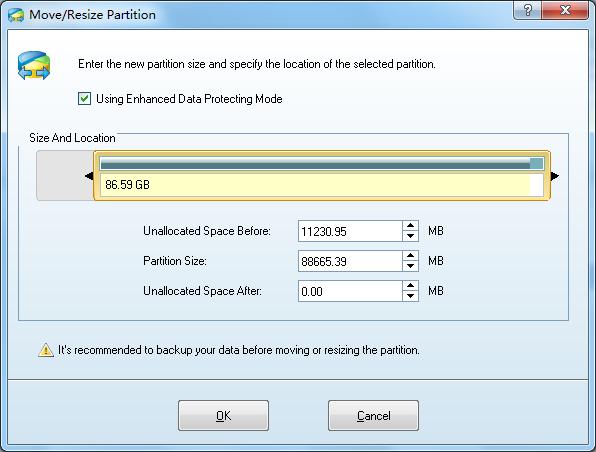
Shrink drive D to get 10.9 GB free space between drive C and drive D. Please select drive D from MiniTool Partition Wizard, and click Move/Resize button from the toolbar. You will see the popup window like the following screenshot. And then drag the left border of the partition to the right to shrink this partition. And then click OK button.
Step 2: 10.9 GB unallocated space is created between drive C & drive D. And then please select drive C, and click "Move/Resize" button from the toolbar again.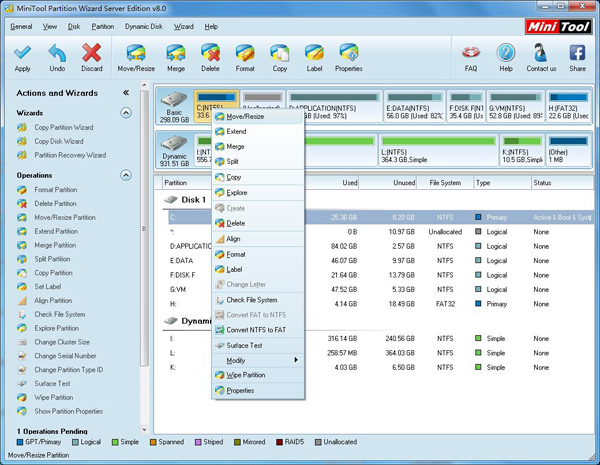
Step 3. Position the mouse pointer to the right edge of the partition. Please drag mouse to the right to extend C partition when the mouse pointer changes to a double-headed arrow. And then click OK button.
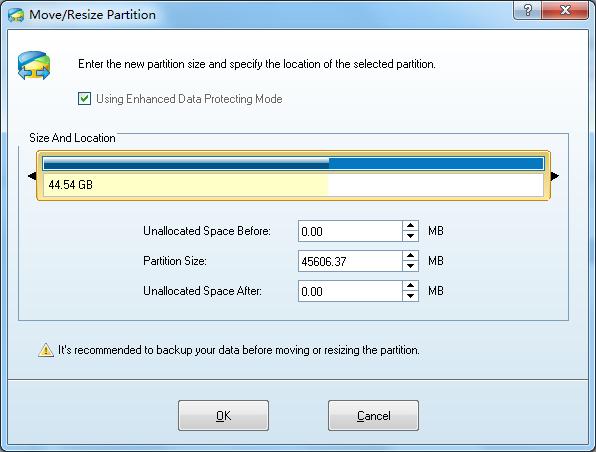
And then you could see your drive C is extended:
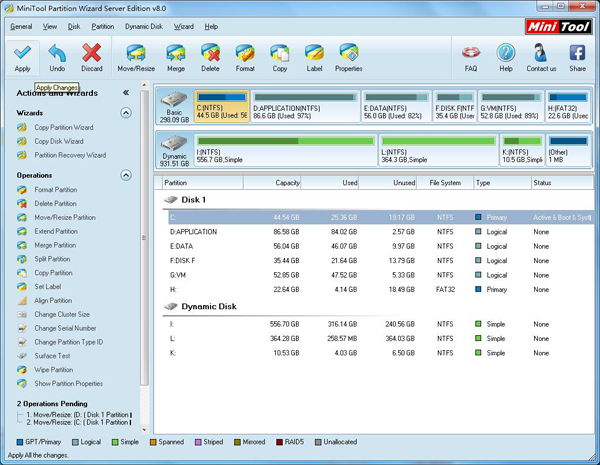
Step 3:Click Apply button.